Friday, August 14, 2020

3D Printed Waterproof Boxes and Cases: Solving Sealing

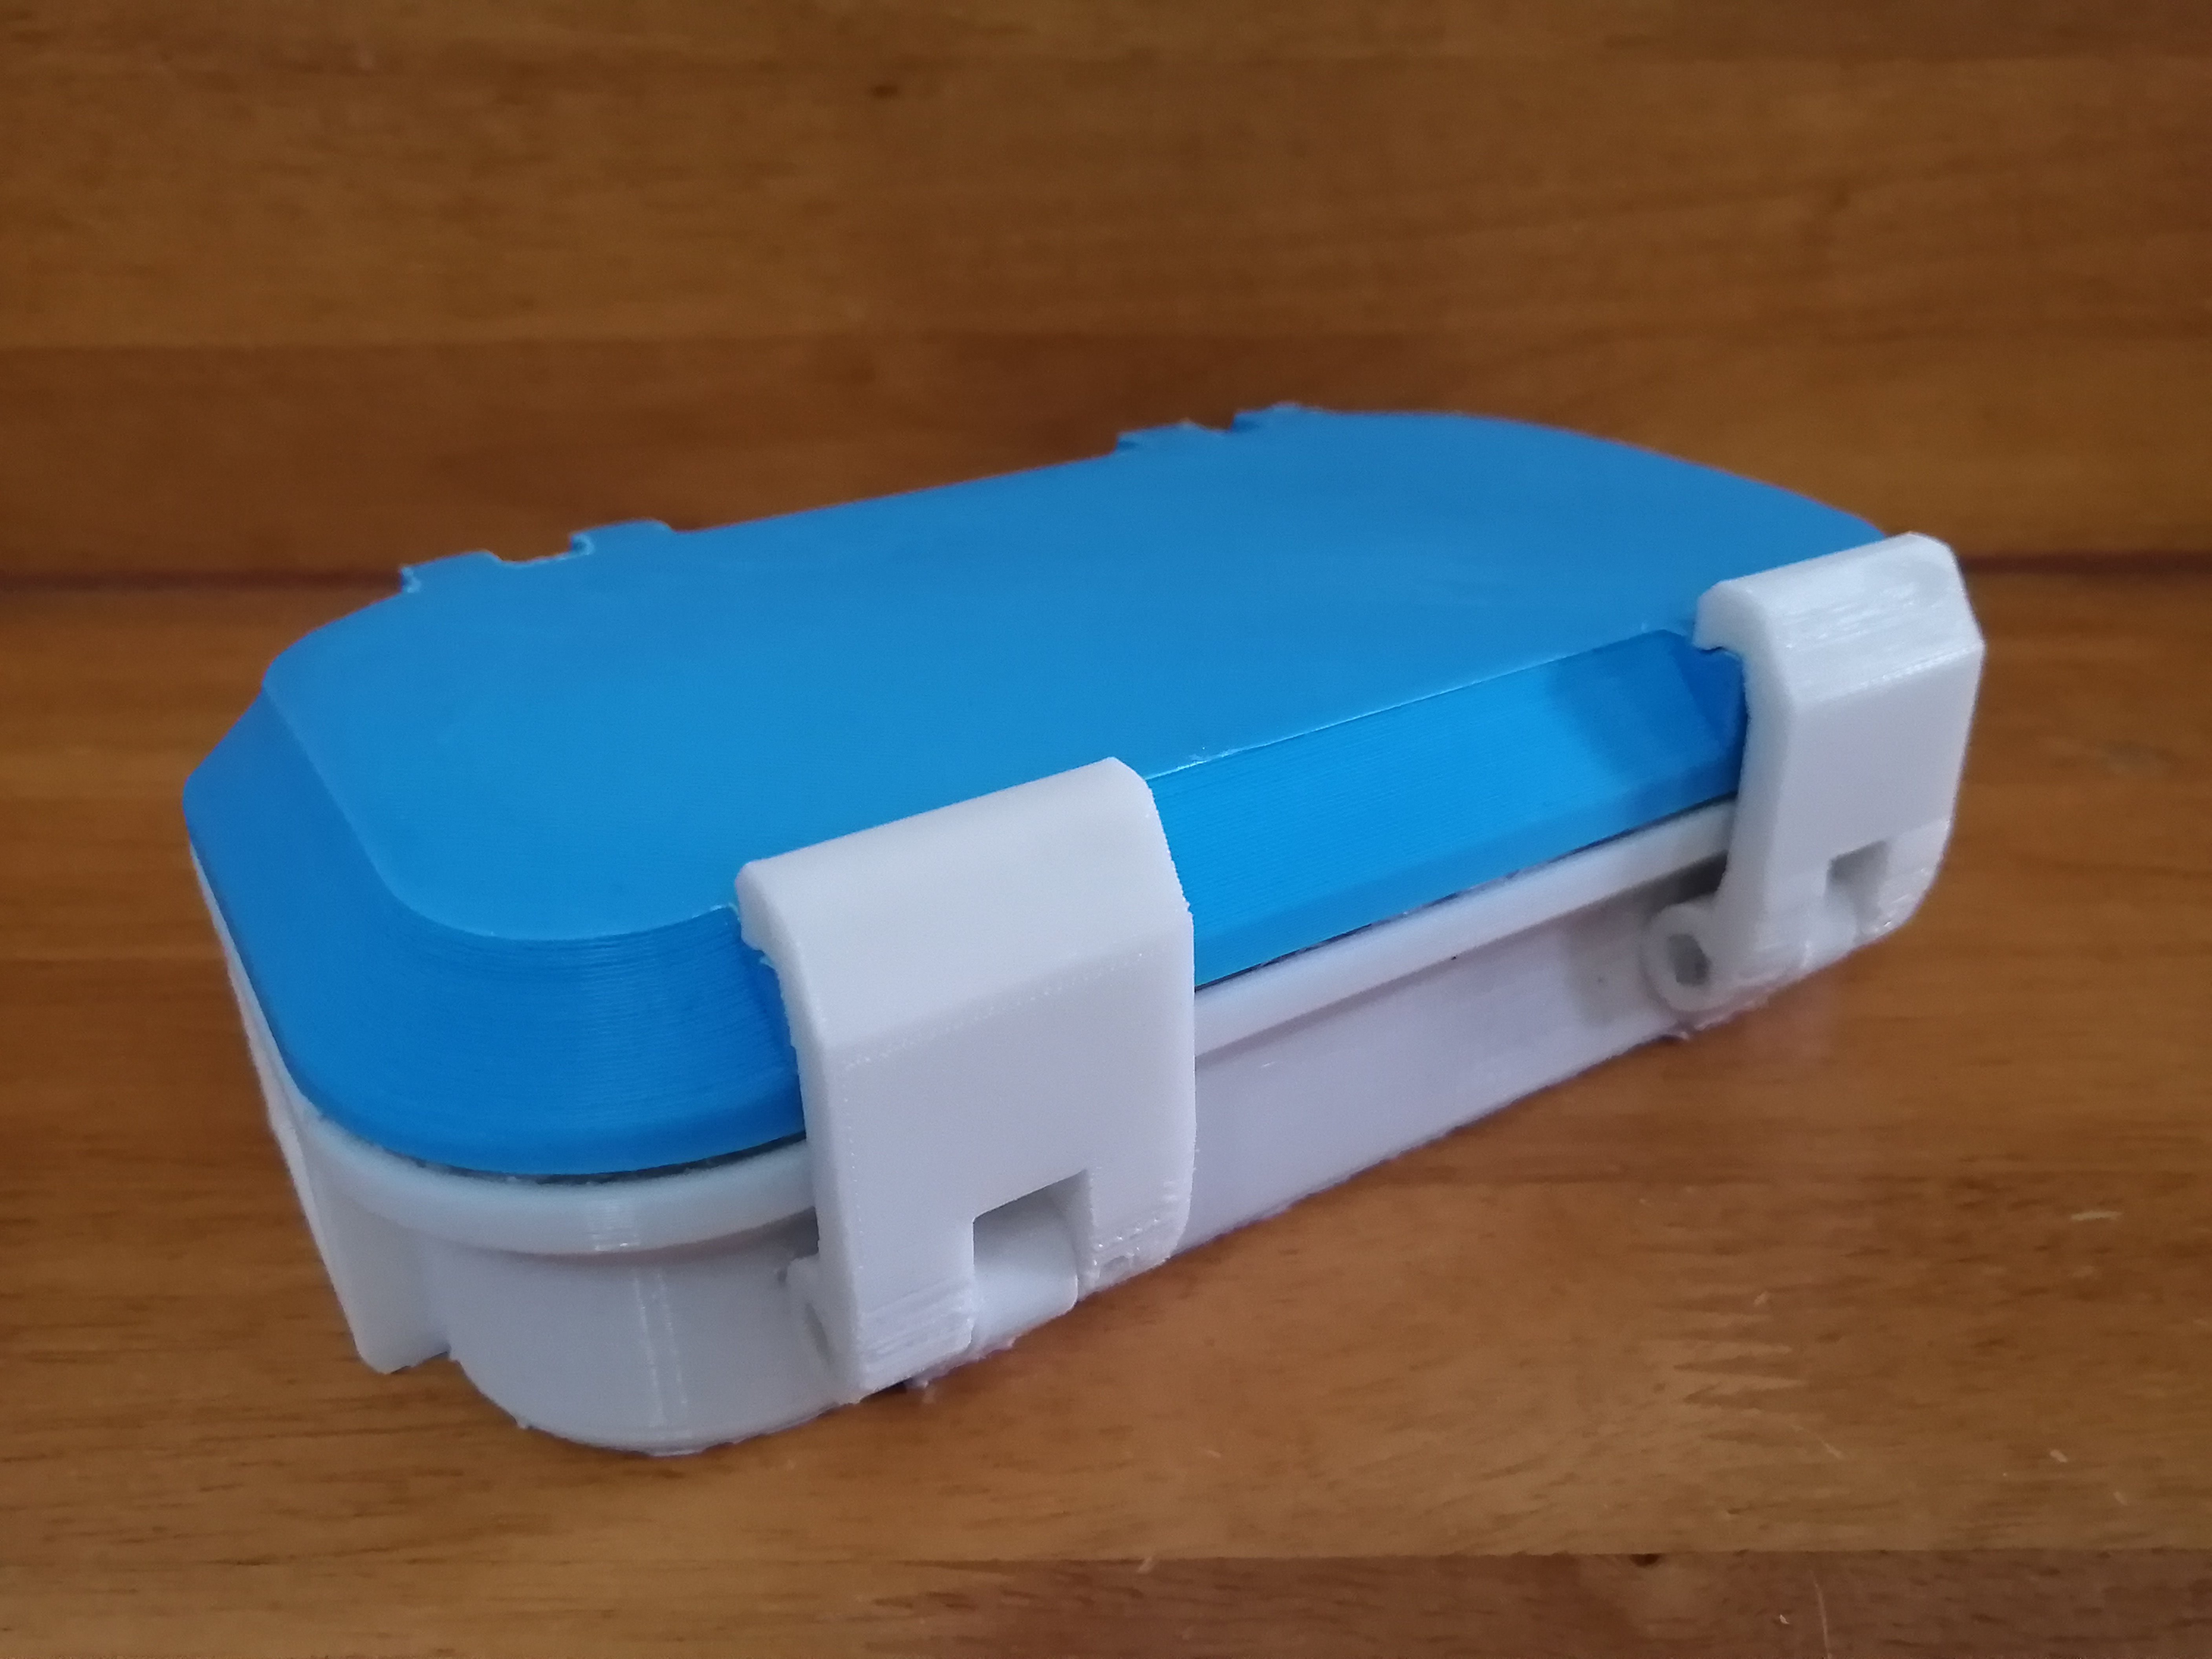
Creating a 3D printed waterproof box sounds simple enough. But there are many factors to consider and it is not as easy as it first seems. 

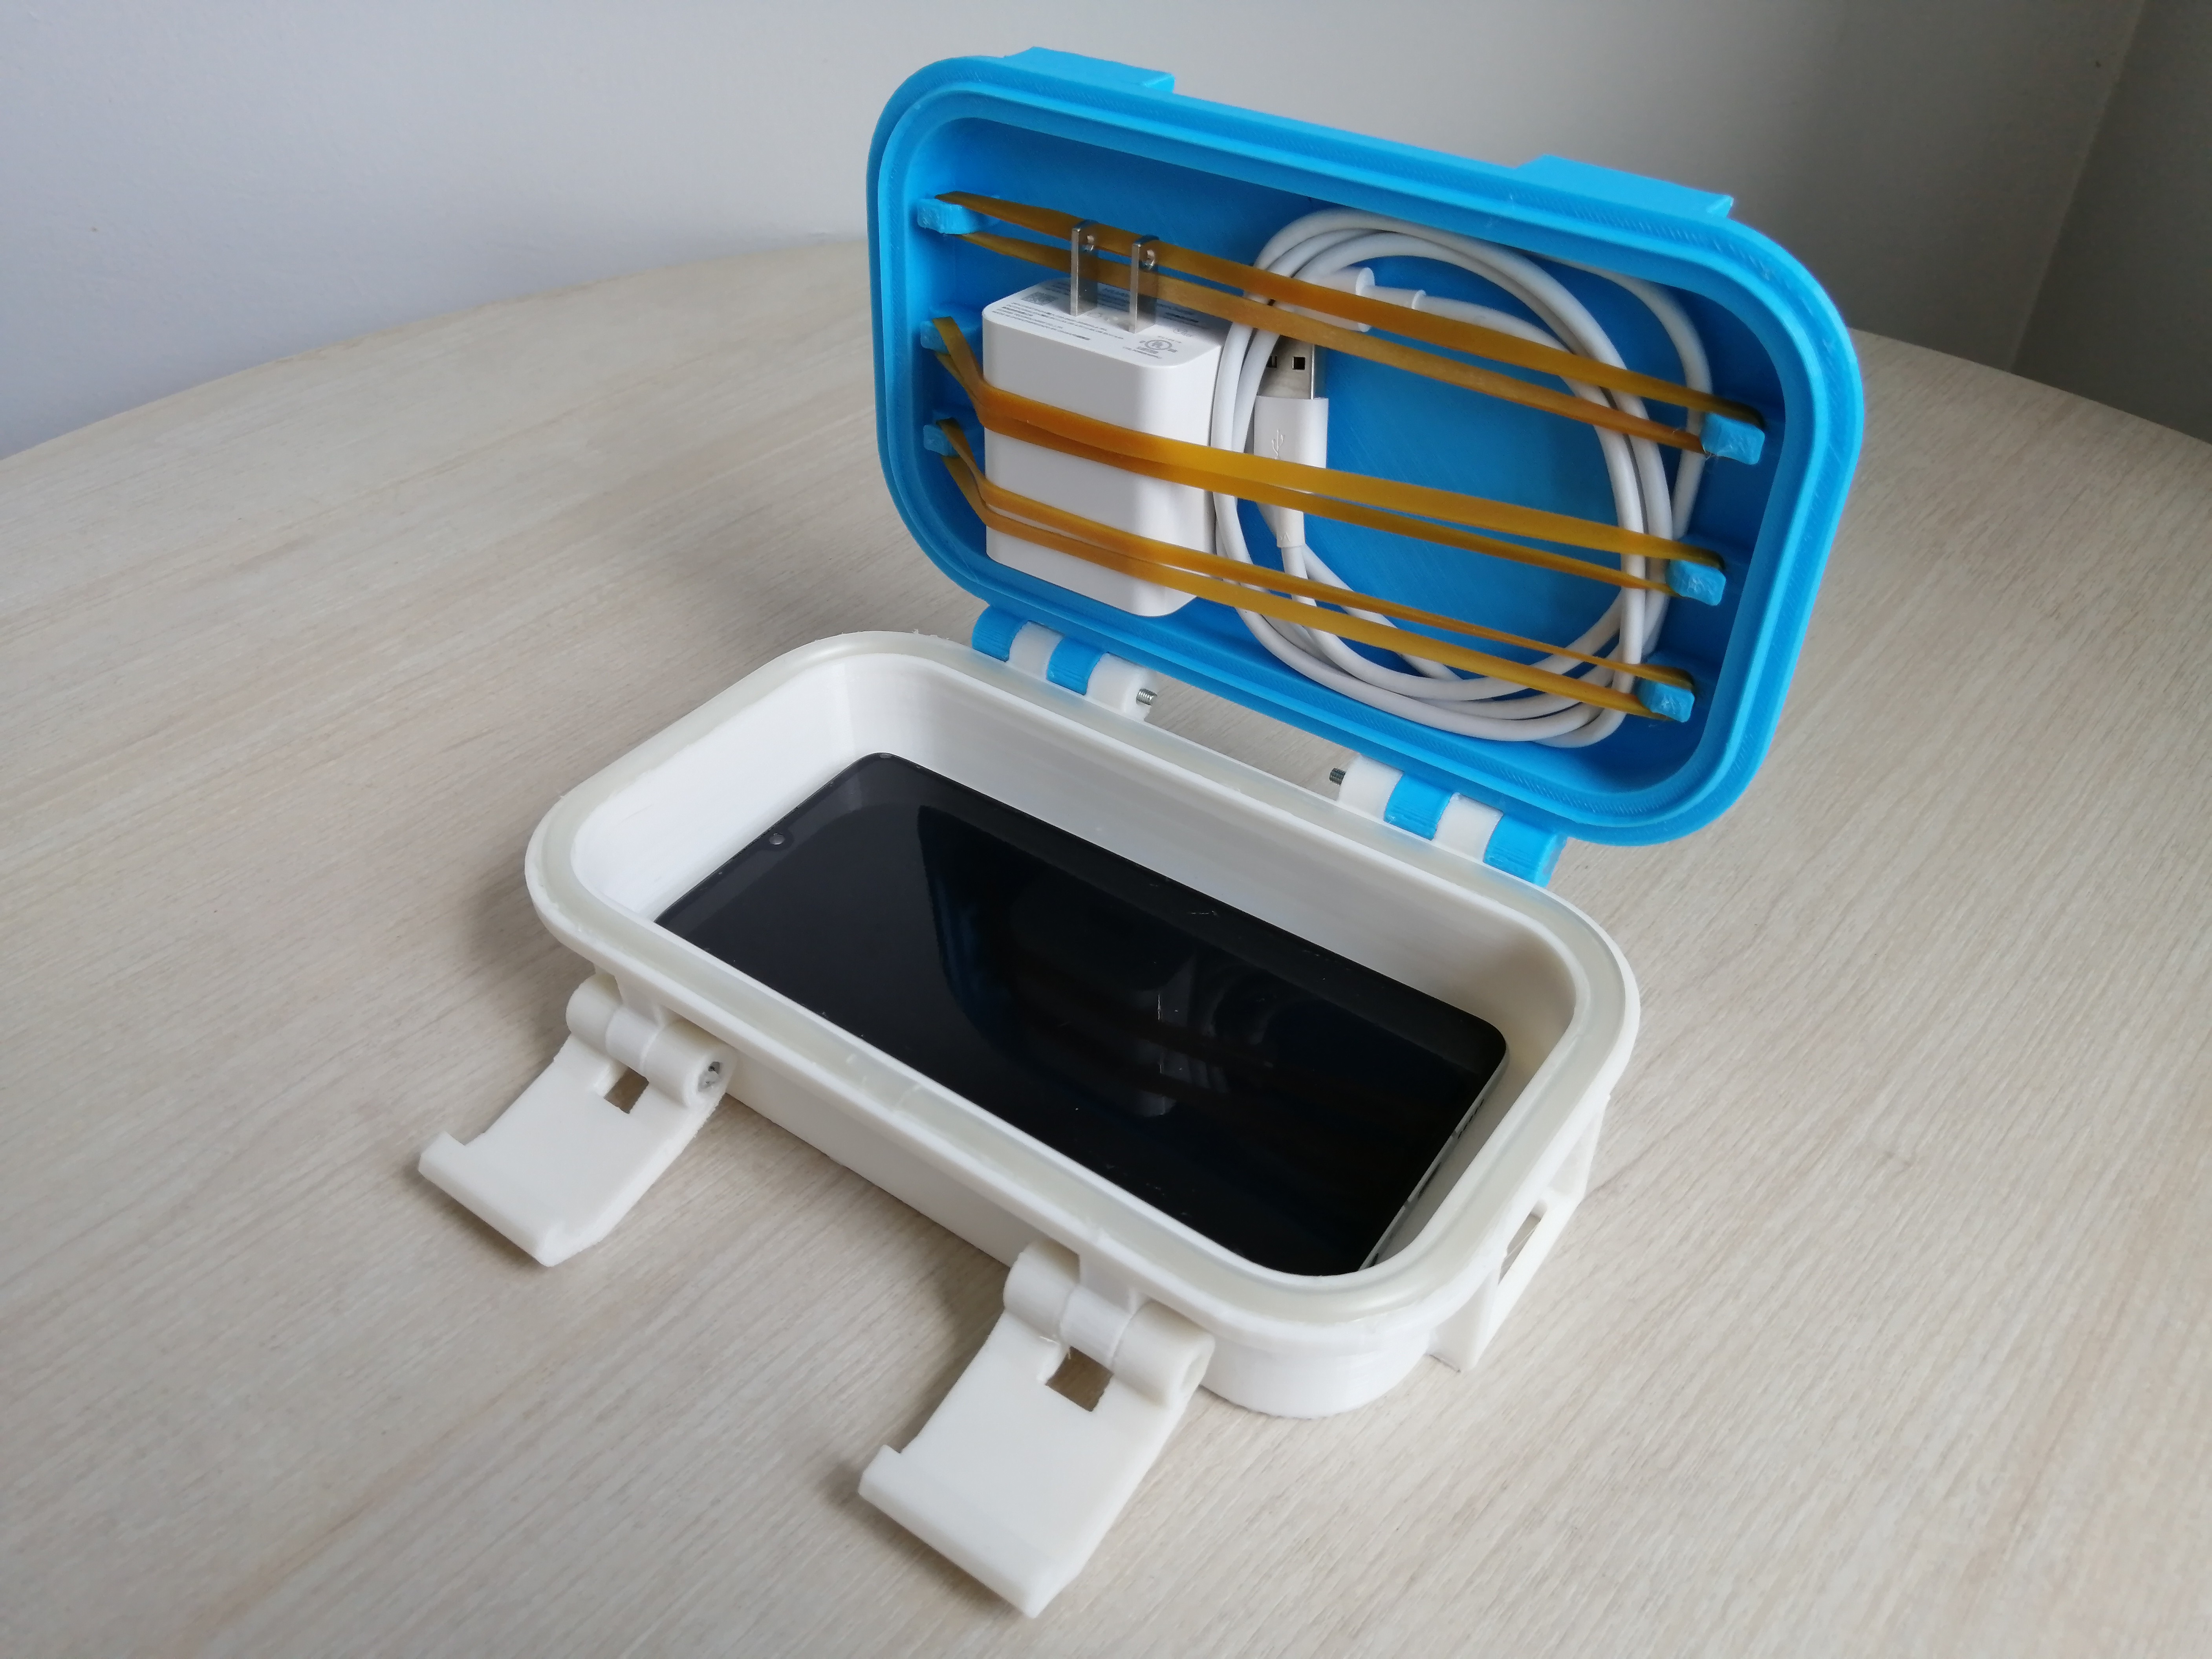
Silicone aquarium tubing works perfectly but only when perfectly placed in the groove and the cut ends are perfectly connected. 12 hour tests have kept out all water, while subsequent tests of just an hour or so would see water make it in. 
3D printing settings like shell thickness and infill are important. So is designing a seal. There is no readily available design guides on how to do this. It really is just a matter of trying to reverse-engineer examples of reliably waterproof boxes already onhand. 

Then there is testing. Testing to see if something that took hours to print out at 100% infill always begins with a sense of impending doom. 

Tuesday, July 28, 2020

3D Printed Water Resistant Case Redesign

We learned a lot from the first couple of tries and completely reworked the design not only to make it more water resistant but also more functional. Printing at 100% takes a long time and it would be nice to have a case that is actually useful when it's done.
The walls on this version are 3mm vs 2mm in the previous version. We also used 45 degree angles instead of curves and kept all the overhang for the seals to the outside rather than interior of the case.

Sunday, July 26, 2020

3D Printing: Waterproof and Water Resistant Boxes

We've been experimenting with different designs to see if we could make a 3D printed waterproof box. The results were mixed and while we ultimately need only something that is weather proof and water resistant, the exercise will definitely help inform future designs. 


With a 100% infill and 2mm thick walls and using silicone aquarium tubing the design is sufficiently water resistant meaning it can be out in the weather, dropped in the water, and even fully submerged (for up to 10 minutes) without allowing any water inside.

However, the nature of 3D printing plastic means that there is always the chance that water can eventually make its way through the layers no mater what the infill percentage. We've submerged this design completely under water for 1 and 2 hour intervals at a time multiple times and find that a small amount of water eventually makes its way in.


Better sealing material and some sort of protective paint or epoxy on the outer surface could likely solve this problem.

This box is part of a larger greenhouse project that will require weatherproof enclosures and a growing environment that is highly controlled. Learning the limitations of 3D printing for extreme objectives like waterproofing will help inform the design process of future systems.


Thursday, May 28, 2020

3D Printed Cyberdeck

What started out as a quick temperature sensor/display set up quickly escalated into a much larger project.


I needed to display the temperature in different parts of the home office and ended up using a spare powerbank, Arduino, and DHT11 sensor to do it. I wanted to 3D print a permanent case for it but as I began designing it I decided to make it possible to include my phone and space for additional Arduino projects to be mounted to take advantage of the powerbank.


Eventually what emerged was a very large phone case with a rack system that allows you to load phones, powerbanks, and in the future Raspberry Pi projects (and more) in a very modular design. The phone can be charged by the powerbank, the powerbank can run Arduino projects, and the phone itself can also power very simple Arduino projects like the temperature sensor/display.

An older project, the Pro Micro-run mini-keyboard was incorporated into the case, meaning those keys you see actually work when you connect a mounted phone to the internal Arduino Pro Micro. It works the other way around too. You can connect the case buttons to any computer and use the shortcut keys (home/end/enter/etc.) or use that computer (if it has the Arduino IDE) to reprogram the keys.

A WiFi-enabled Arduino board could also connect sensor data to the phone or Raspberry Pi directly or to the cloud and then displayed on the phone (and anywhere else with access) sort of like we did with our weather station a while ago.

Saturday, April 25, 2020

Full-Sized 3D Printed Ventilator Prototype

We've built a full-sized functional prototype of our 3D printed low-cost opensource mechanical ventilator. The video shows the ventilator in action but keep in mind it is still a stand-in 13kg-cm servo rather than the original 25kg-cm servo our original specs called for.


Future videos will feature not only the new servo (once it arrives) but also a control panel with rate and percentage selector knobs.

All the files are up on Thingiverse and Wikifactory. If you have questions, comments, or inquiries, feel free to contact us via our "Contact Us" page here

Thursday, April 16, 2020

Building a Ventilator, Opening Up Human Healthcare

Our project is up on Thingiverse here. It includes some STL files for printing as well as a SketchUp 2017 file with all the parts, an assembled and labeled view, an exploded view, and the parts laid down for 3D printing. 

Introduction: Covid-19 has woken up many people to the inadequacies of modern human healthcare. One of the many things lacking appears to be cheap, accessible, mechanical ventilators, especially ones that could be used during surges such as a virus outbreak, an accident, or natural disaster.

Servo-driven linear actuator controlled by an Arduino Uno compatible microcontroller will be used to compress a ball valve mask (BVM) resuscitation bag, functioning as a low-cost mechanical ventilator.

Many teams are now focused on developing a solution to this problem. Hopefully one (or more) of these teams will produce a solid, opensource design that can be replicated and distributed around the world where and when needed and not just for Covid-19 but for anyone who needs access to ventilators.

Hopefully it is the first of many examples of opening up human healthcare and the technology that drives it. 

Friday, October 25, 2019

DIYbio Orbital Shaker Gets Circuitboard Upgrade

Our original opensource 3D printed mini-DIYbio orbital shaker has been made a couple times by several people around the world.

While nothing makes us happier than seeing people making, enjoying, and improving on our designs we were really excited to see a Florida-based engineer Pierre Baillargeon design and build a proper, custom-made circuitboard to accommodate all the electronics of our shaker design.

These boards would also work with our larger V2 shaker which uses the same electronics as V1.


The board provides mounting for a stepper motor controller, an Arduino Pro Mirco, as well as connections for the shaker's peripheral devices (the stepper itself, a potentiometer, DC power jack, and switch). 


You can see the before-and-after (below) of what the insides of the shaker look like with and without the circuitboard. To Pierre's credit, even his prototype shaker's electronics are tidier than the mess of wires we ended up with.


Opensource is all about sharing and in many ways, motivating others to take the next step. We're not engineers by trade, but seeing how nice that circuitboard came out gives us inspiration to look into KiCAD and give designing and making boards like this a try. We have lots of projects that could benefit from this next step.

Thanks to Pierre, at least as far as our orbital shaker design is concerned, there is now a circuitboard taking care of it. Thanks Pierre!

 The design is available on GitHub here.

Tuesday, September 3, 2019

Teaching Large 3D Printing Classes: Tips and Tricks

Teaching large classes 3D design and 3D printing skills can be a challenge especially if you're teaching at a school or university and students might not be particularly attentive to traditional lecturing approaches.


Having helped teach a large university class of over 70 students, I wanted to write down a few methods used to make the class a success to serve as a reference for myself in the future and also to help anyone who happens across this post.

Class Objectives

The objective was to teach students with no 3D design or 3D printing background how to build a 3D model of a product design sketch they developed in a previous class in SketchUp, set it up for 3D printing using slicer software (Cura, Colido), and use 3D printers (Ender 3, Ender 5, Colido 3.0) to print out their designs.

Projects also had to be prepared for presentation, with students using cardboard and other craft supplies to create a setting for their 3D printed model that helped illustrate its purpose and use.

Setting Up the Class

All 70+ students had their own sketches from their previous course. But the students were placed into 14 groups with 3-7 students in each group for the 3D design and 3D printing class.

Sunday, August 4, 2019

Custom HID: Mini-Editing Keyboard

August 4, 2019 | ATL

We've finished up another HID (hardware interface device) and posted it up on Thingiverse here. This time it's a mini-keyboard used for editing text on a smartphone or tablet computer. It's meant to be used singlehandedly so closely resembles a remote control.


It is driven by an Arduino Pro Micro. These small boards are great for HID projects because the processor supports USB connections. The code uses Arduino's keyboard modifiers.

Once we got the code working for a couple of keys, it was real easy to elaborate and tune the code to do exactly what we wanted.

The keys/code we used include: arrows, shift+left/right arrows (for selecting text), copy/paste, undo/redo, home, select all, and delete.


We can imagine a lot of other possibilities for HIDs in the future after seeing how easy this project was. A previous HID project we worked on was a giant, physical volume knob for one of our desktop computers available here on Thingiverse

Not only is this a great solution for creating custom HID's to solve specific workflow problems, when coupled with 3D printing it can also be a solution for users who are unable to use common commercially available HIDs (standard keyboards and mice) because of physical limitations.

Follow ProgressTH.org on Instagram here. We also put all of our 3D printed models online for free at Thingiverse.com here

Monday, July 22, 2019

Video: 3D Printed DIYbio Magnetic Stirrer V2 Overview + Assembly

July 22, 2019 | ATL

This video provides a demonstration and assembly instructions for our V2 magnetic stirrer.


Follow ProgressTH.org on Instagram here. We also put all of our 3D printed models online for free at Thingiverse.com here

Saturday, July 20, 2019

Video: 3D Printed DIYbio Centrifuge V3 Overview

July 20, 2019 | ATL

Here is a video overview of version 3 of our 3D printed DIYbio centrifuge. Check out the diagram below to see how the parts fit together. The video goes over the wiring and friction welding.


The assembly diagram and wiring diagram appear after the break...

Friday, July 19, 2019

3D Printed DIYbio Magnetic Stirrer Version 2

July 19, 2019 | ATL

Version 2.0 of our 3D printed DIYbio magnetic stirrer is now up on Thingiverse here.  Parts, wiring instructions, and other information is all included, just follow the link.

We've been using our version 1 magnetic stirrer a lot recently and have been using it on and off since we first built it years ago.

It was the first piece of 3D printed DIYbio equipment we ever made. But it was time for an upgrade.

Changes

We needed something that was not only a lot bigger and more powerful, but also something that could be better controlled in terms of rotor speed and support more weight.

A big problem with our original design was anything heavy on the platform caused it to sag and make contact with the fan and magnets underneath. This impeded operation and risked ruining the fan.

This new design is very solid with support going from the platform all the way through the machine, down to its foot pads and onto the table beneath. There is no way for the platform to sag because of weight now.

We are using a 12V DC motor with a 3D printed magnet rotor designed to take x6 13mmx2.5mm neodymium magnets. To control the motor's speed we're using a cheap motor controller from Shenzhen.


We've also redesigned the stir bar. The smaller one still works really well for smaller containers. But the more volume you are stirring or the thicker a container's base is the larger your stir bar's magnets need to be.


Thursday, June 20, 2019

3D Printed DIYbio Centrifuge V 3.0

June 20, 2019 | ATL

Version 3 of our open source 3D printed centrifuge is now up on Thingiverse. We're still making some minor improvements but the design as is can be used.


The design has the rotor below the platform and is better isolated from the electronics.

The microswitch that shuts off power when the lid is opened is activated by a plunger which is located just slightly below the top platform. This prevents the switch from being accidentally activated when the lid is opened.

The hinges have been made stronger and the front bolt-latch has been offset to make it easier to insert and retract the bolt during use. The picture above is slightly different than the STL files on Thingiverse which have been improved since we built the above prototype.

Like version 2, it's run on 12V DC, with a 12V DC motor, a rocker switch, DC adapter plug, and a microswitch.